Organization Settings
Purpose: Comprehensive guide for configuring your Quant0 organization settings, authentication policies, security posture, and account management from the admin portal.
Access Path
- Go to the admin area.
- Open Organization Settings.
- Navigate across the tabs to manage specific administrative domains.
1. General
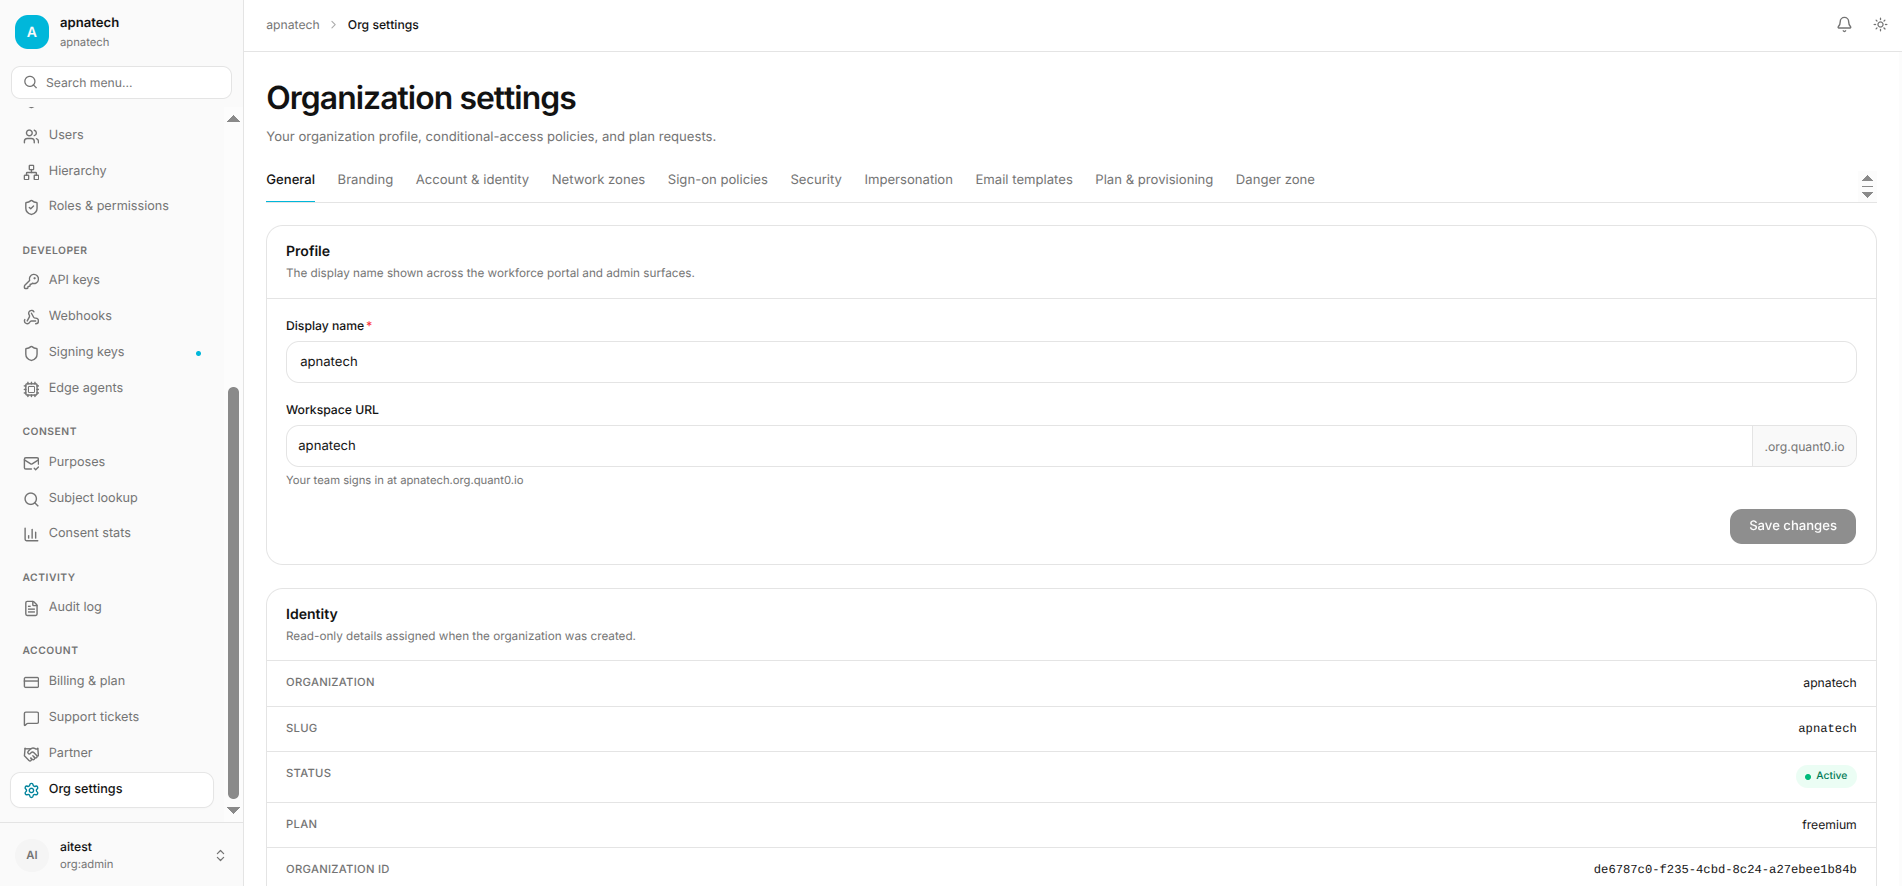
Purpose: Defines the basic organization profile and the public identity of your workspace.
How to Update
- Open Organization Settings.
- Click General.
- Update the Organization display name.
- Update the Workspace URL / subdomain if needed.
- Save the changes.
What to Set
- Organization name: Official workspace title visible across the portal.
- Workspace URL: Custom routing path for your organization.
- Basic company identity: Public parameters visible to end users.
2. Branding
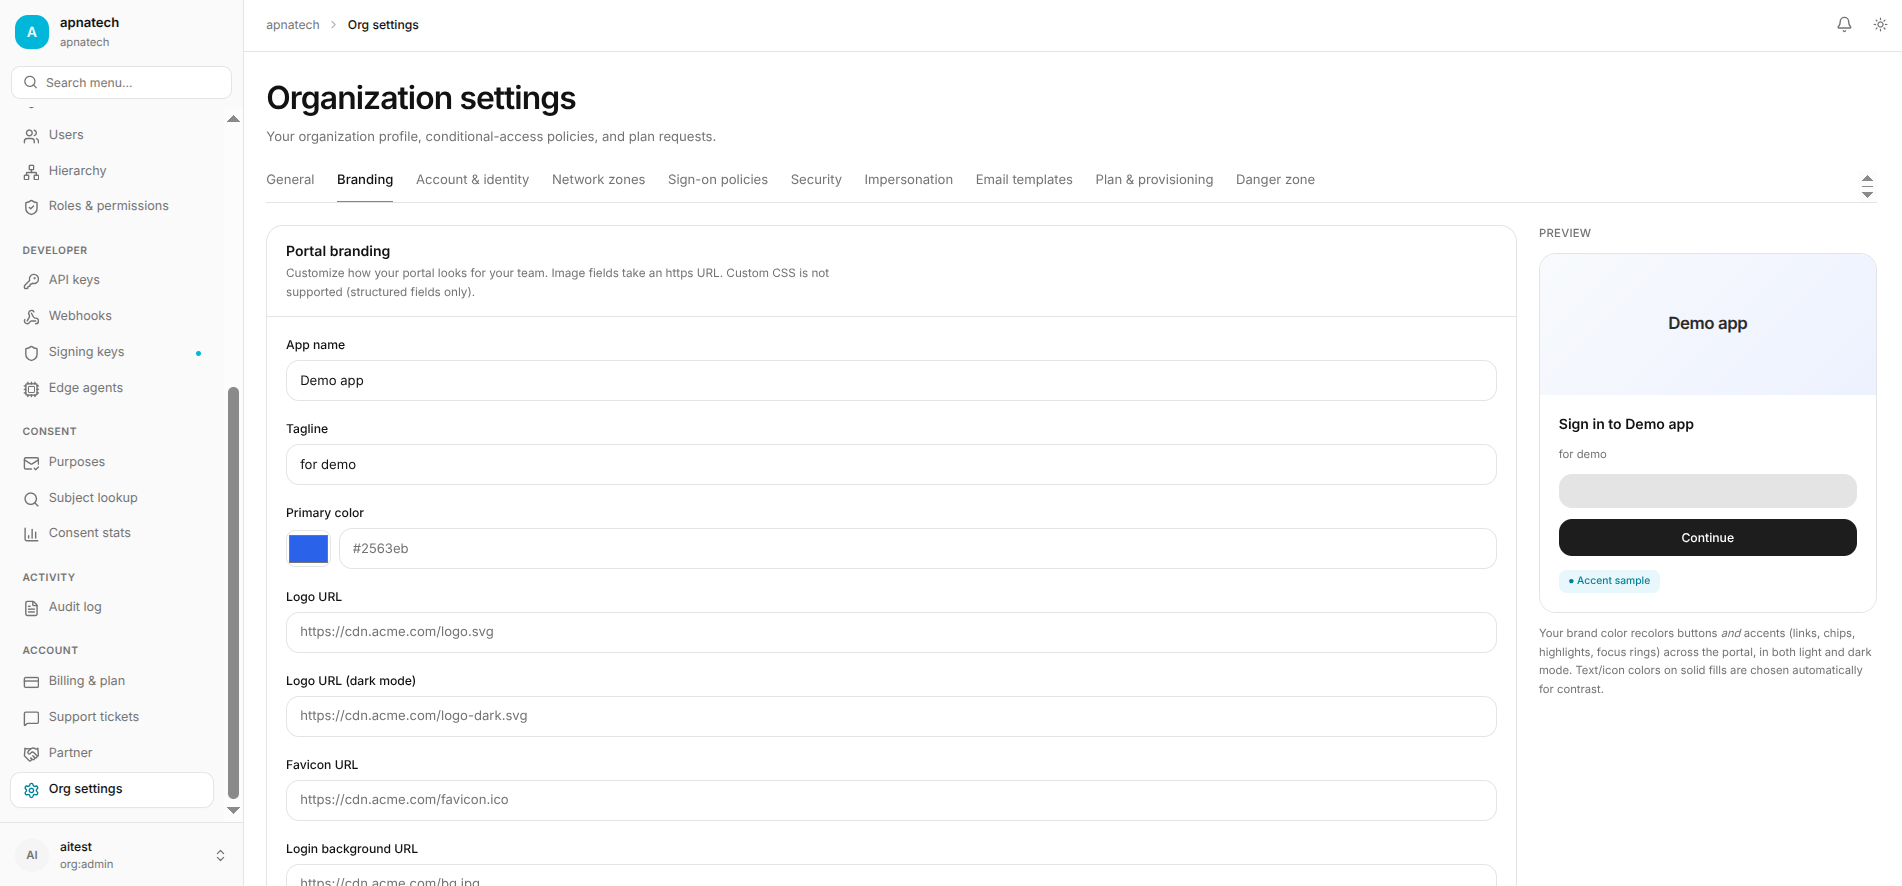
Purpose: Matches the portal appearance with your corporate identity to build trust and consistency.
How to Update
- Open Organization Settings.
- Click Branding.
- Enter the required brand assets and URLs.
- Review the live preview.
- Save changes.
What to Set
- App name & Tagline: Main heading and subtitle text on the portal interface.
- Primary color: Main visual focal color for action buttons and accents.
- Logo URLs: Public paths for main logo, dark mode logo, and browser favicon.
- Login background image URL: Visual background graphic for the authentication screen.
- Support URL: Direct link to your internal helpdesk or corporate support.
3. Account & Identity
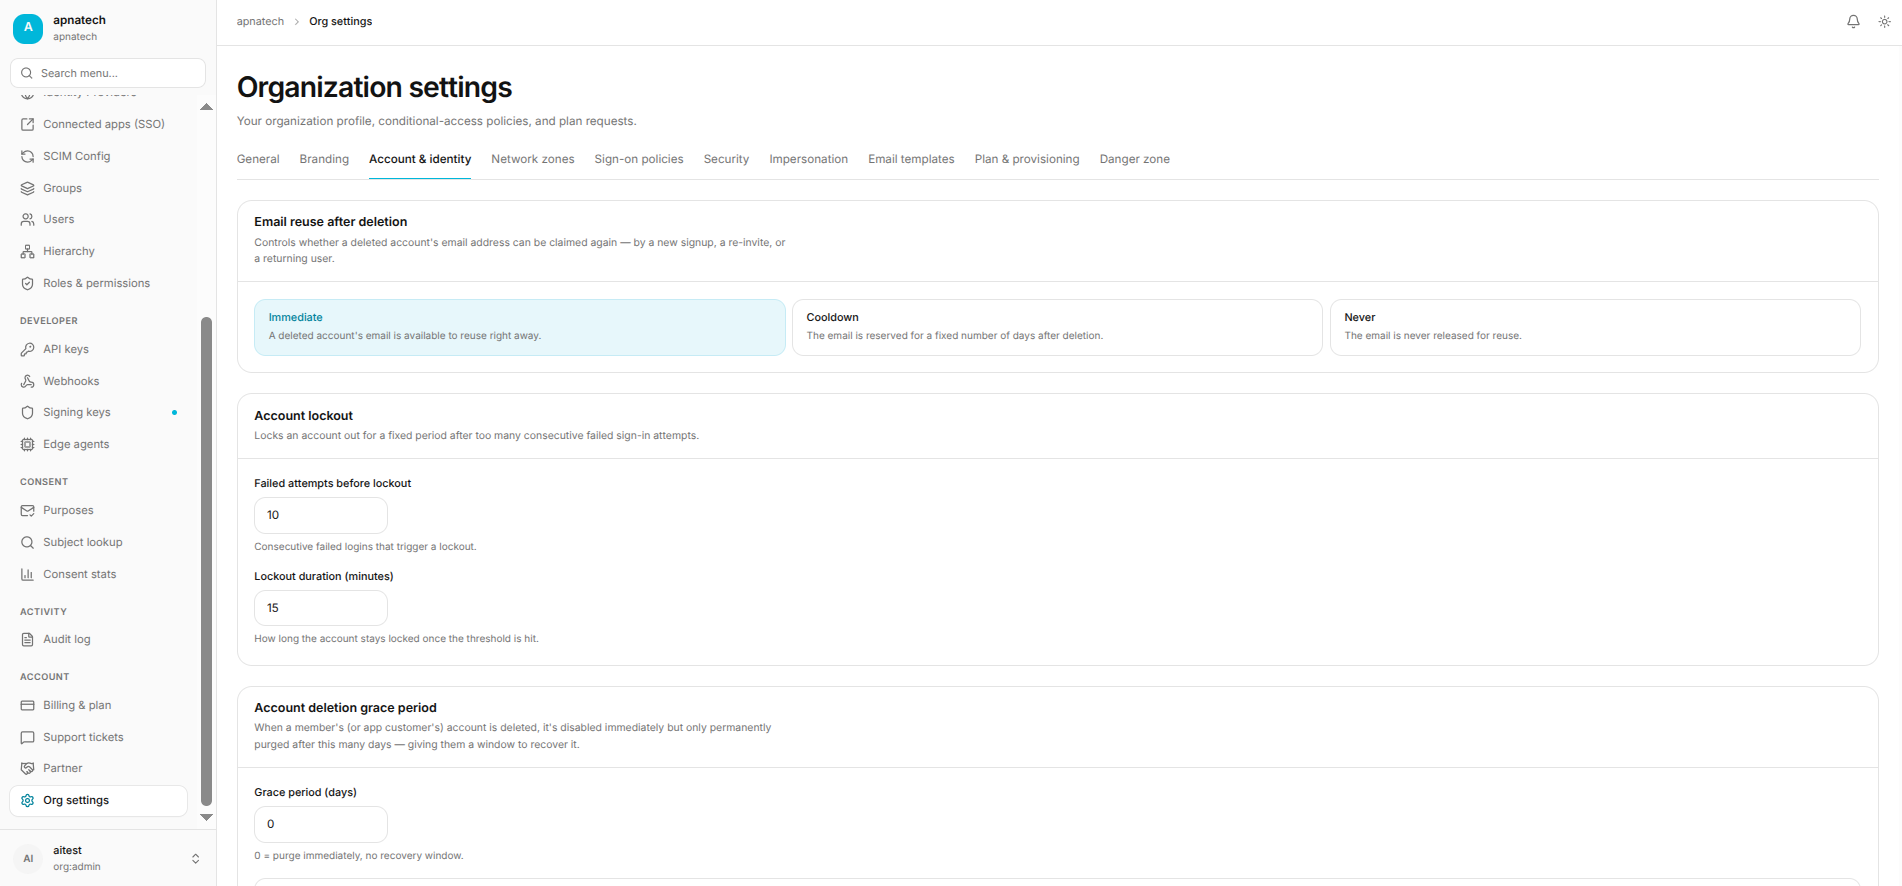
Purpose: Controls account lifecycle behaviors, security cooldowns, and login safety rules.
How to Update
- Open Organization Settings.
- Click Account & identity.
- Review security rules and adjustment parameters.
- Save changes.
Settings Explained
- Email reuse after deletion: Choose whether a deleted email can be reused immediately, after a cooldown, or never.
- Failed attempts before lockout: Set how many failed sign-ins trigger an automated lockout.
- Lockout duration: Set how long the user remains locked out before trying again.
- Grace period after deletion: Set recovery time frame before permanent data deletion.
4. Network Zones
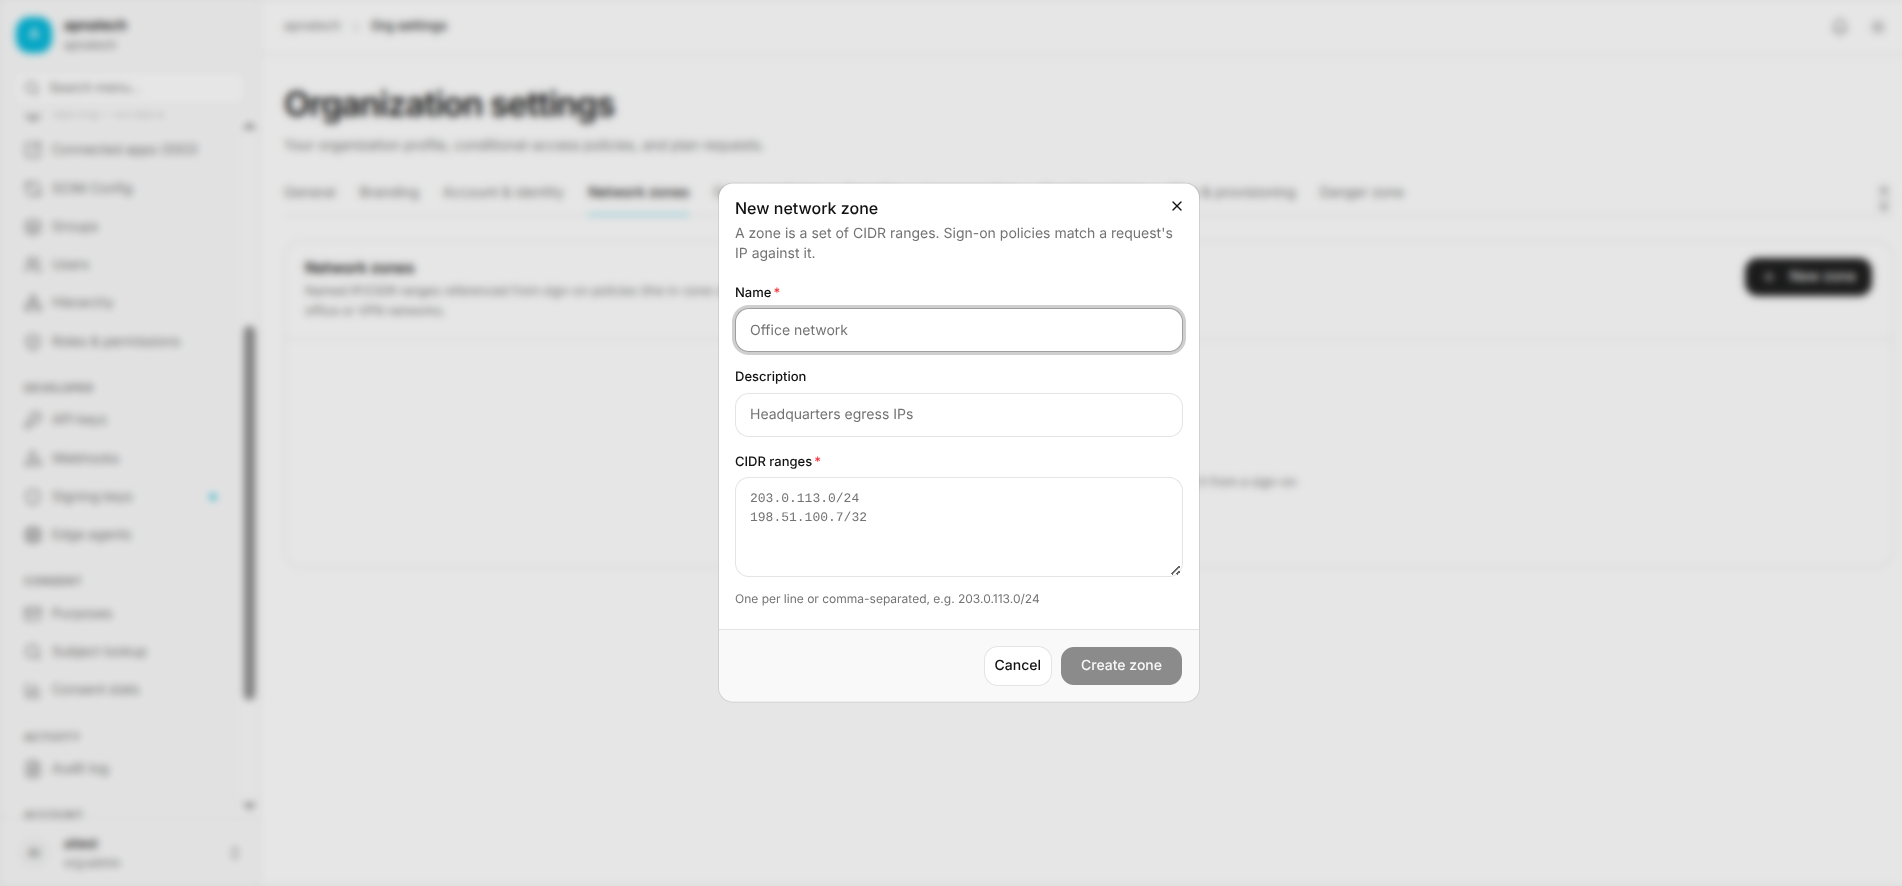
Purpose: Defines trusted IP ranges such as office networks, VPN gateways, or infrastructure subnets.
How to Update
- Open Organization Settings.
- Click Network zones.
- Click New zone.
- Enter Zone name, Description, and CIDR ranges / trusted IP networks.
- Save changes.
Examples
- Office network: Main HQ physical location.
- VPN network: Secure remote worker access gateway.
- Head office subnet: Internal infrastructure segments.
- Partner access network: Authorized external vendor subnets.
5. Sign-On Policies
Purpose: Controls application access rules based on incoming context and risk conditions.
How to Update
- Open Organization Settings.
- Click Sign-on policies.
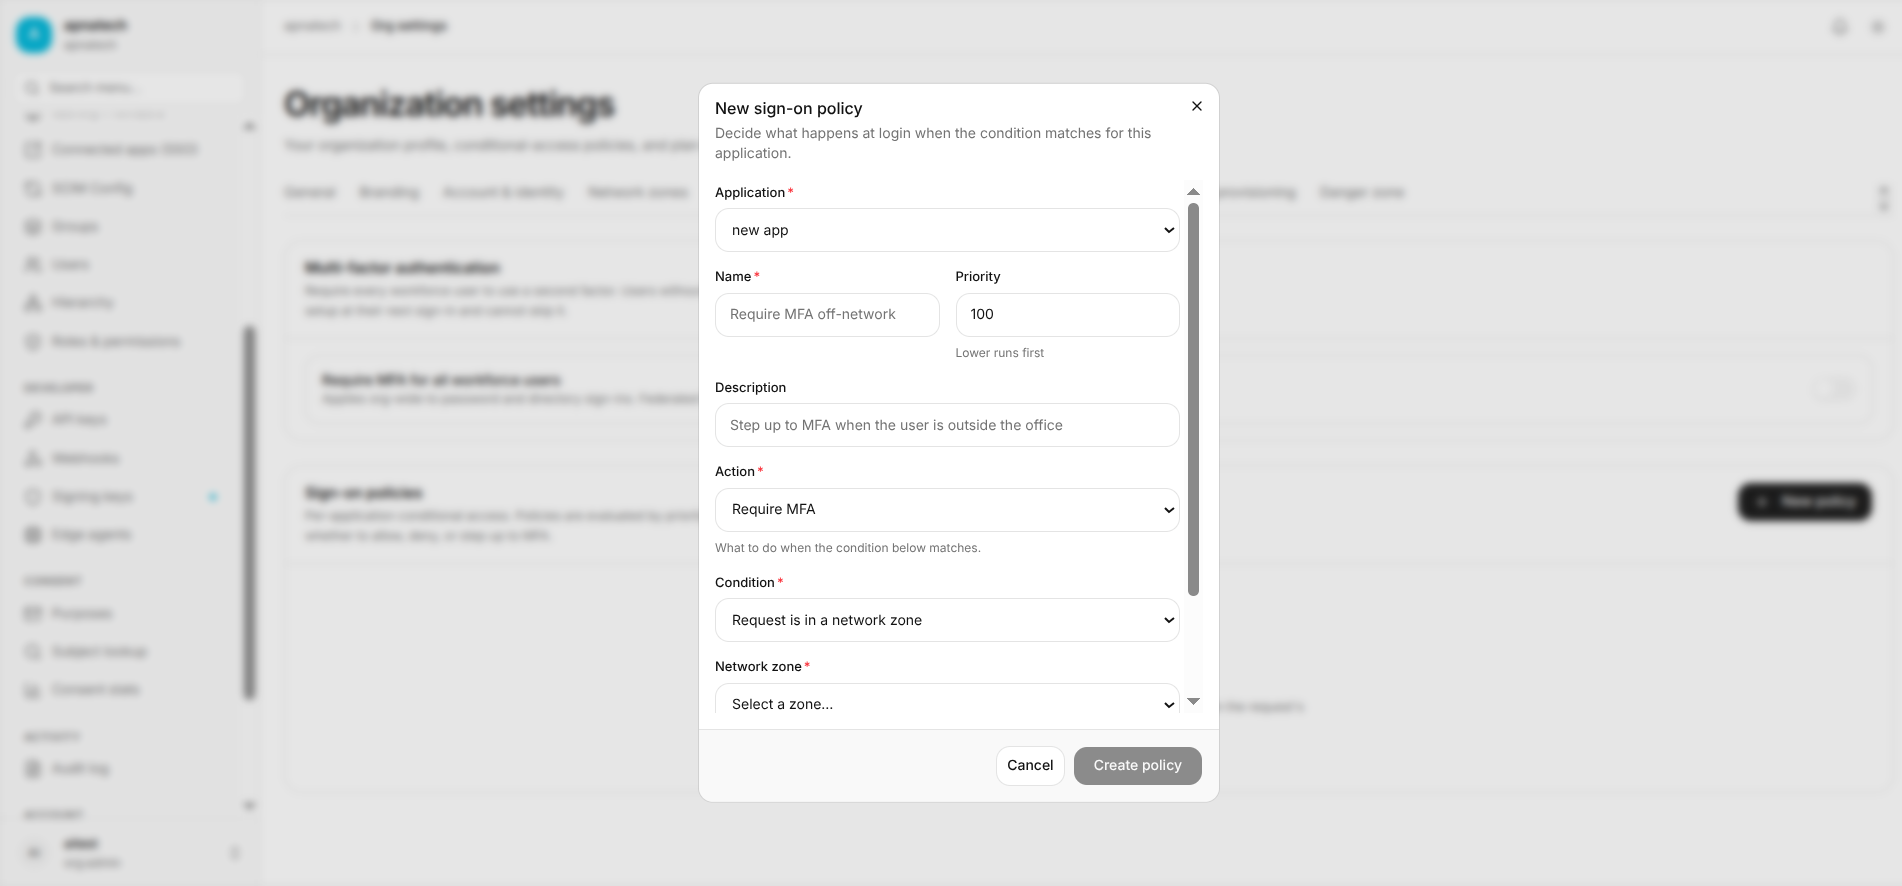
- Click Create policy.
- Select target application, policy name, description, and evaluation priority.
- Choose action:
Allow,Deny, orRequire MFA. - Define condition:
In a network zone,Not in a network zone,User has completed MFA, or custom parameters. - Save changes.
Examples
- Allow access only from office network.
- Require MFA for all remote users.
- Block access from untrusted network zones.
- Allow users only from trusted devices and network paths.
6. Security
Purpose: Configures overall authentication policies and overall organization security posture.
How to Update
- Open Organization Settings.
- Click Security.
- Review available controls and tweak threshold settings.
- Save changes.
Key Areas
- Step-up reauthentication: Controls how often users re-confirm identity before executing sensitive actions.
- Session settings: Manages active session length, idle timeouts, and automatic sign-out windows.
- Password policy: Defines password complexity, minimum length, and rotation requirements.
- Verification windows: Sets validity time limits for password reset links, magic links, and auth codes.
7. Impersonation
Purpose: Manages temporary administrative or support actions where an admin acts on behalf of another user.
How to Update
- Open Organization Settings.
- Click Impersonation.
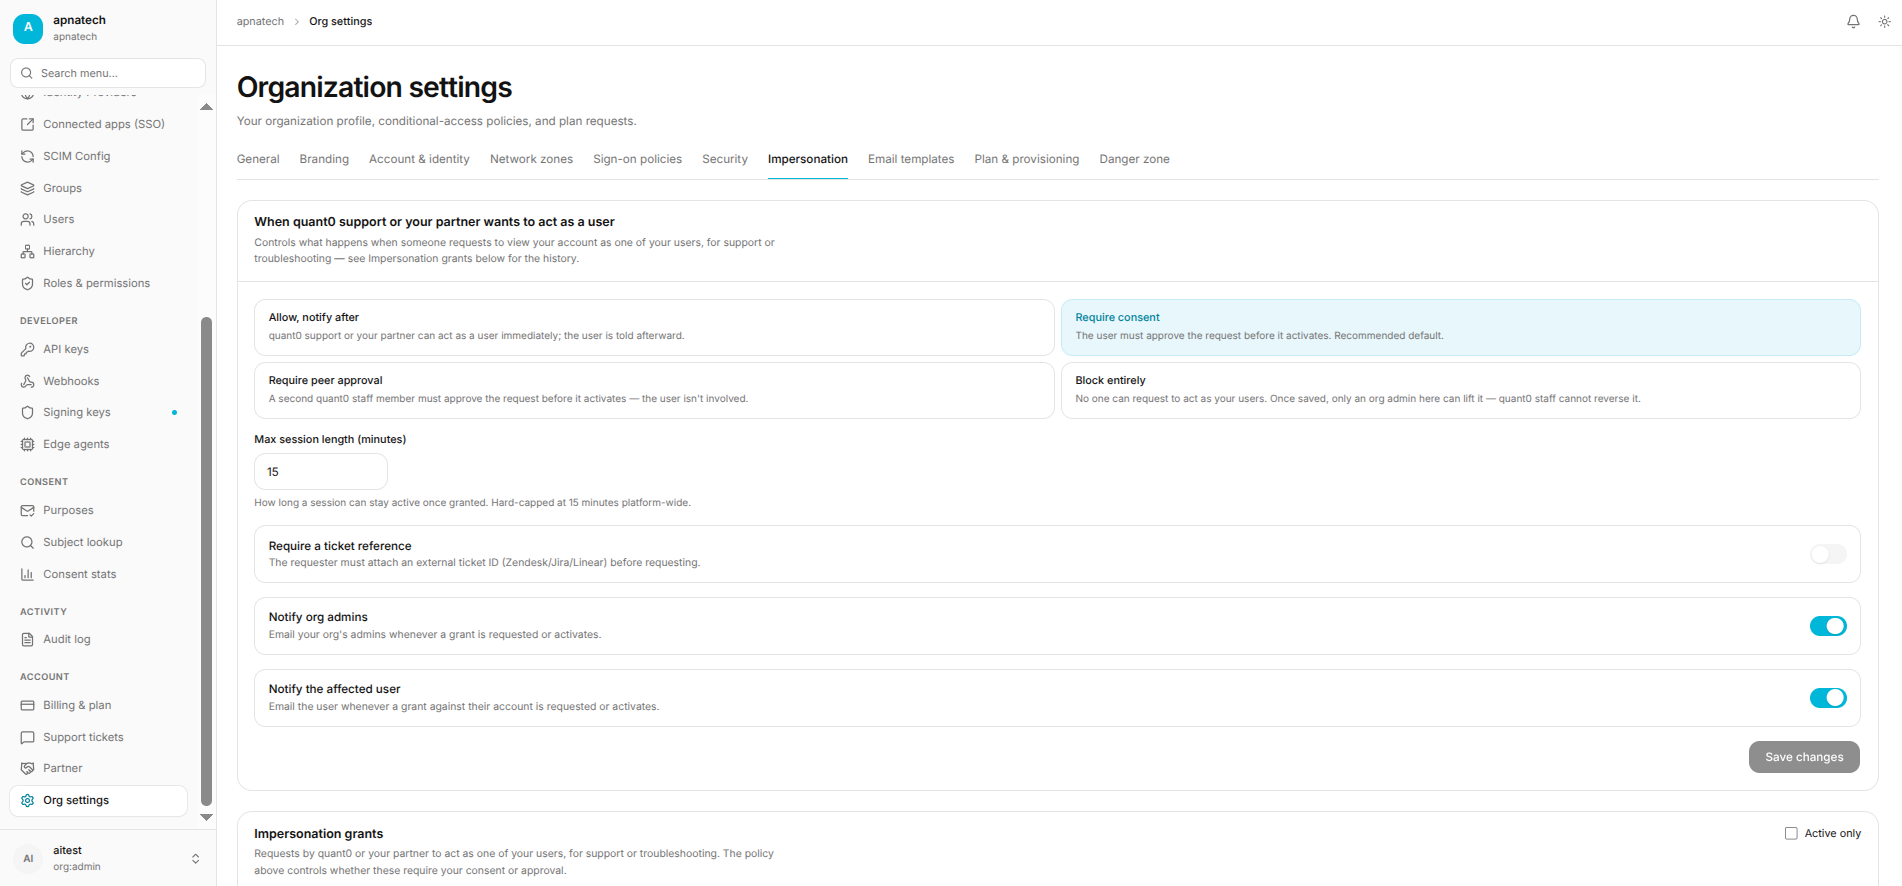
- Review global policy toggles.
- Approve or deny pending access requests.
- Revoke active grants when troubleshooting is completed.
- Review historic grant logs.
What to Control
- Enable or disable impersonation globally.
- Require explicit user consent prior to granting access.
- Enforce administrative approval workflows.
- Audit active or pending support sessions.
8. Email Templates
Purpose: Customizes standard system and transactional messages sent to users.
How to Update
- Open Organization Settings.
- Click Email templates.
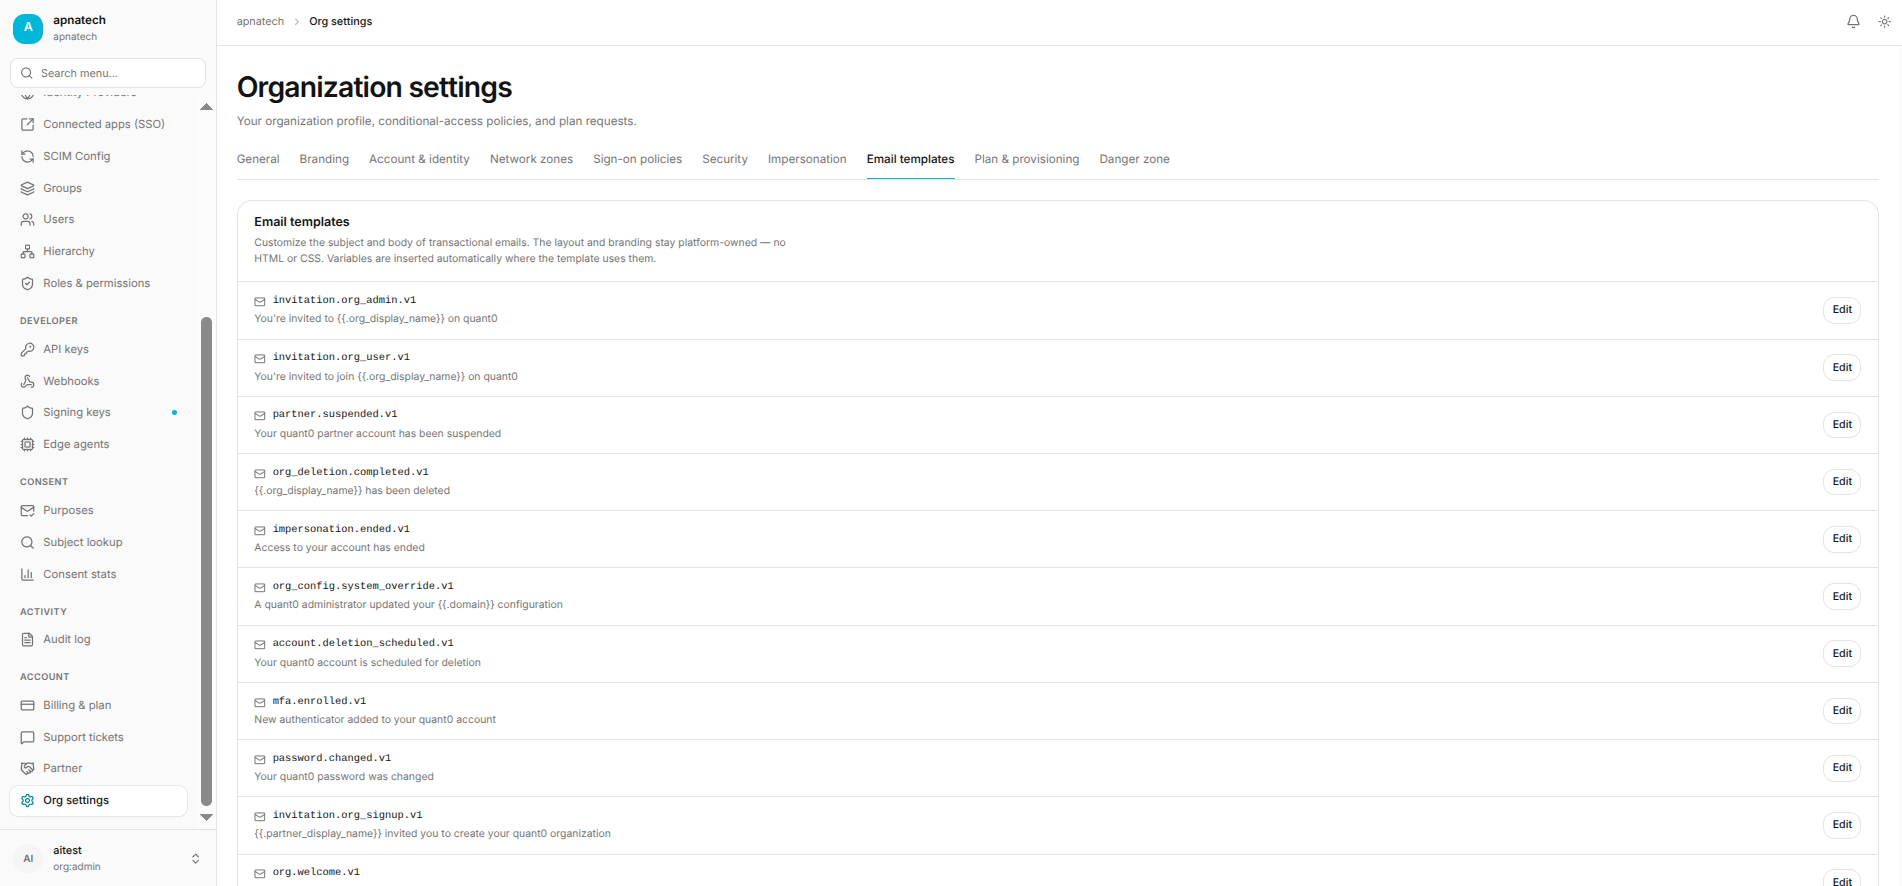
- Select the template to modify (Verification, Password Reset, Welcome, MFA, Security Notification).
- Update the Subject line and Body content.
- Use live preview and send a test email to verify visual formatting.
- Save changes.
9. Plan & Provisioning
Purpose: Handles tier updates, quota adjustments, and administrative platform expansion requests.
How to Update
- Open Organization Settings.
- Click Plan & provisioning.
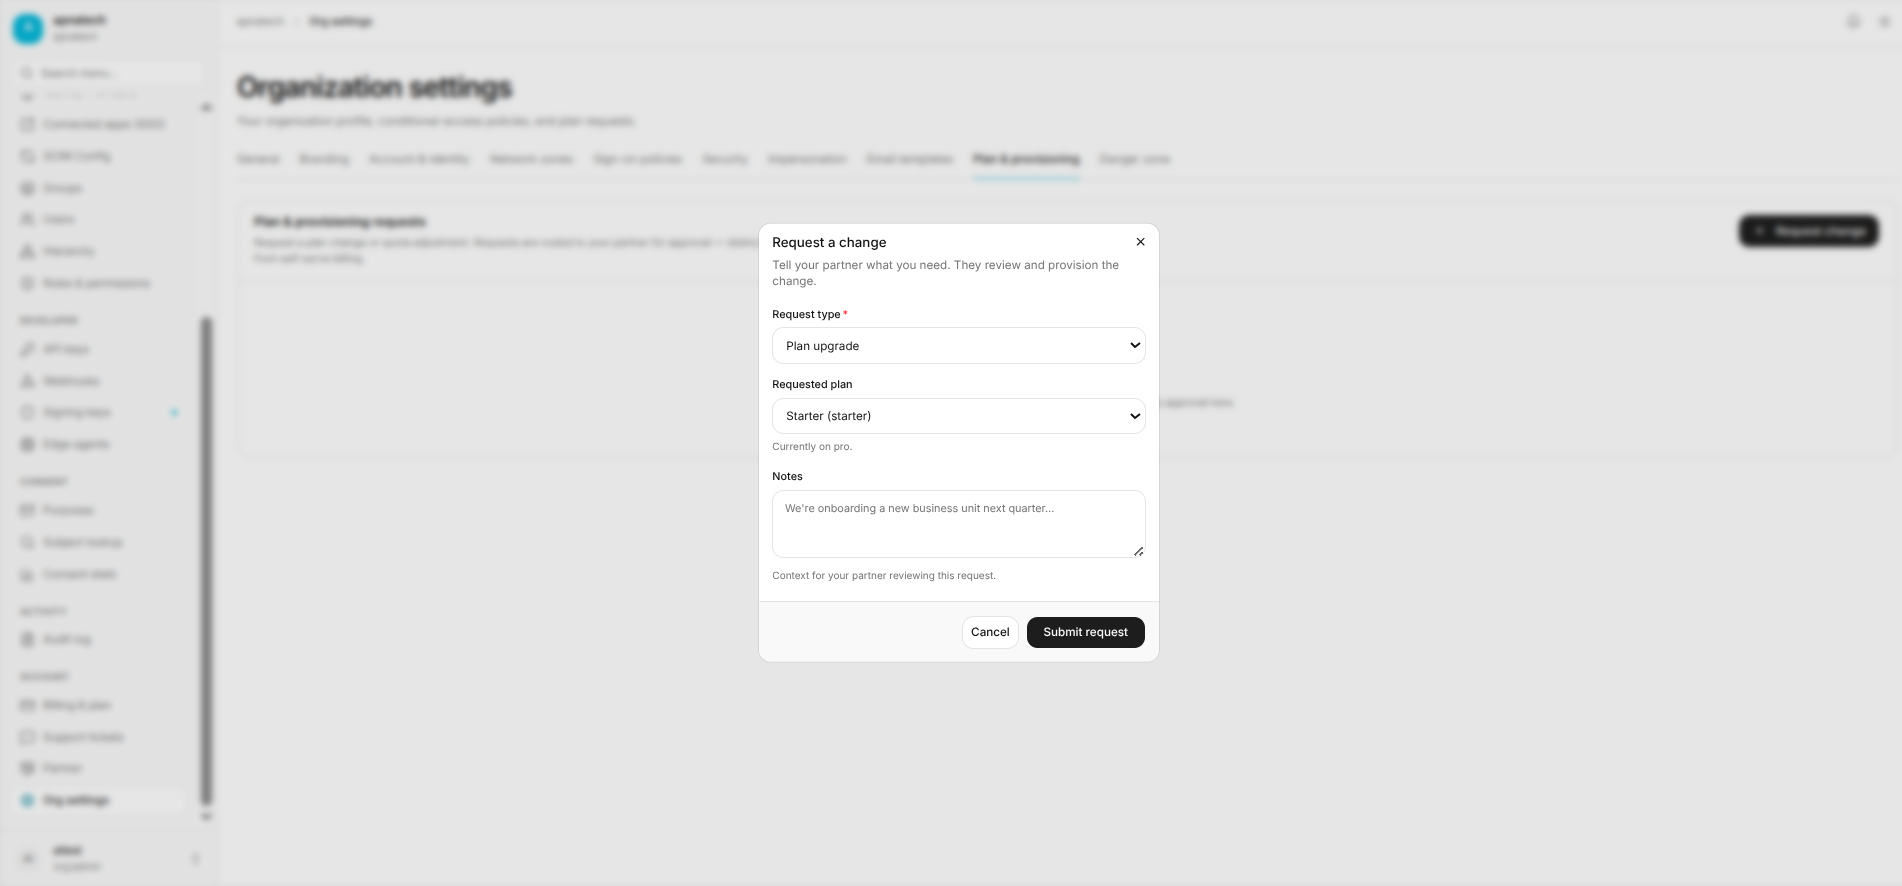
- Click Request change.
- Select request type:
Plan upgrade,Plan downgrade,Quota increase,Quota decrease, orOther provisioning change. - Provide actionable notes or business justification.
- Submit the request and monitor processing status.
10. Danger Zone
Purpose: Houses restricted, high-impact administrative actions and permanent deletion procedures.
How to Update
- Open Organization Settings.
- Click Danger zone.
- Review deletion statuses, pending historical requests, or export parameters.
- Proceed only after verifying necessity and required approvals.
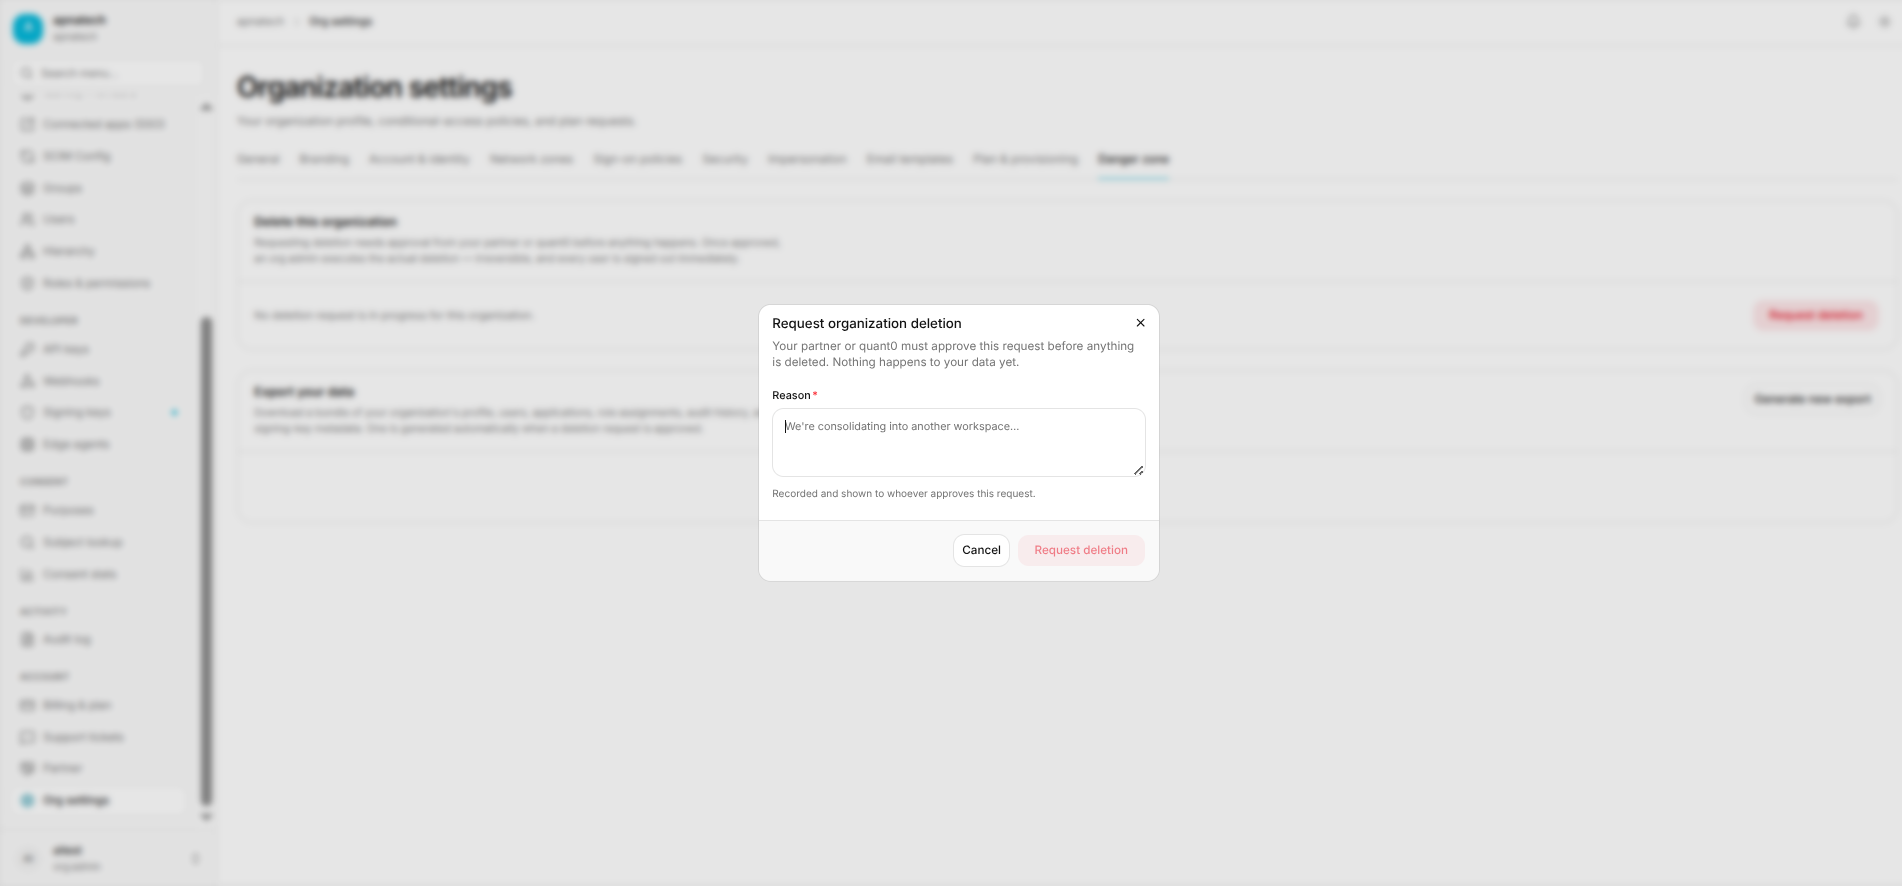
Typical Actions
- Request organization workspace deletion.
- Review approval status for destructive workflows.
- Cancel pending organization deletion requests.
- Inspect historical deletion activity logs.
- Export overall organization data before workspace retirement.