Configure an Application with LDAP
This guide explains how to configure an application with LDAP (Lightweight Directory Access Protocol) as an Identity Provider.
The configuration is completed in the application using the following steps:
- Details
- Connection
- Provisioning & access
- Attribute mapping
- Review
Prerequisites
Before configuring LDAP in the application, make sure you have:
- Access to the application with permission to configure Identity Providers.
- Access to an LDAP directory server (e.g., Active Directory, OpenLDAP, FreeIPA, Google Secure LDAP).
- The LDAP server Hostname / IP address and Port (e.g.,
389for LDAP,636for LDAPS). - A Bind DN (Service Account distinguished name) and Bind Password with read access to the directory.
- The Base DN specifying the root search tree for users and groups.
- The application's required user attributes, such as username, email, and display name.
For standard schema references, see RFC 4511 (LDAP Protocol) and RFC 4519 (LDAP Schema).
Step 1: Create LDAP Service Account & Connection Details
First, prepare your LDAP server connection details and service account credentials. The service account (Bind DN) is used by the application to search and authenticate users in your LDAP directory.
1.1 Identify the Server Host and Port
Determine your LDAP server's access protocol:
- Standard LDAP (Unencrypted / StartTLS): Port
389 - LDAP over SSL/TLS (LDAPS): Port
636
Example host URL:
ldap://ldap.example.com:389
ldaps://ldap.example.com:636
1.2 Create or Obtain a Bind DN Account
Create a service account dedicated to the application in your LDAP directory with permission to search users and read directory attributes.
Example Bind DN syntax:
cn=ldap-service-account,ou=Services,dc=example,dc=com
Security Note: Use a restricted service account rather than an administrative DN (like
cn=admin,dc=example,dc=com).
1.3 Determine Base DN and User Search Filters
Identify the location in your directory tree where users reside:
- Base DN:
ou=Users,dc=example,dc=com - User Search Filter:
(&(objectClass=person)(uid={0}))or(&(objectClass=user)(sAMAccountName={0}))
Step 2: Configure the Identity Provider in the Application
Open the application's Identity Providers section and start a new configuration.
Select:
Identity Provider → LDAP
The configuration wizard opens with the following steps.
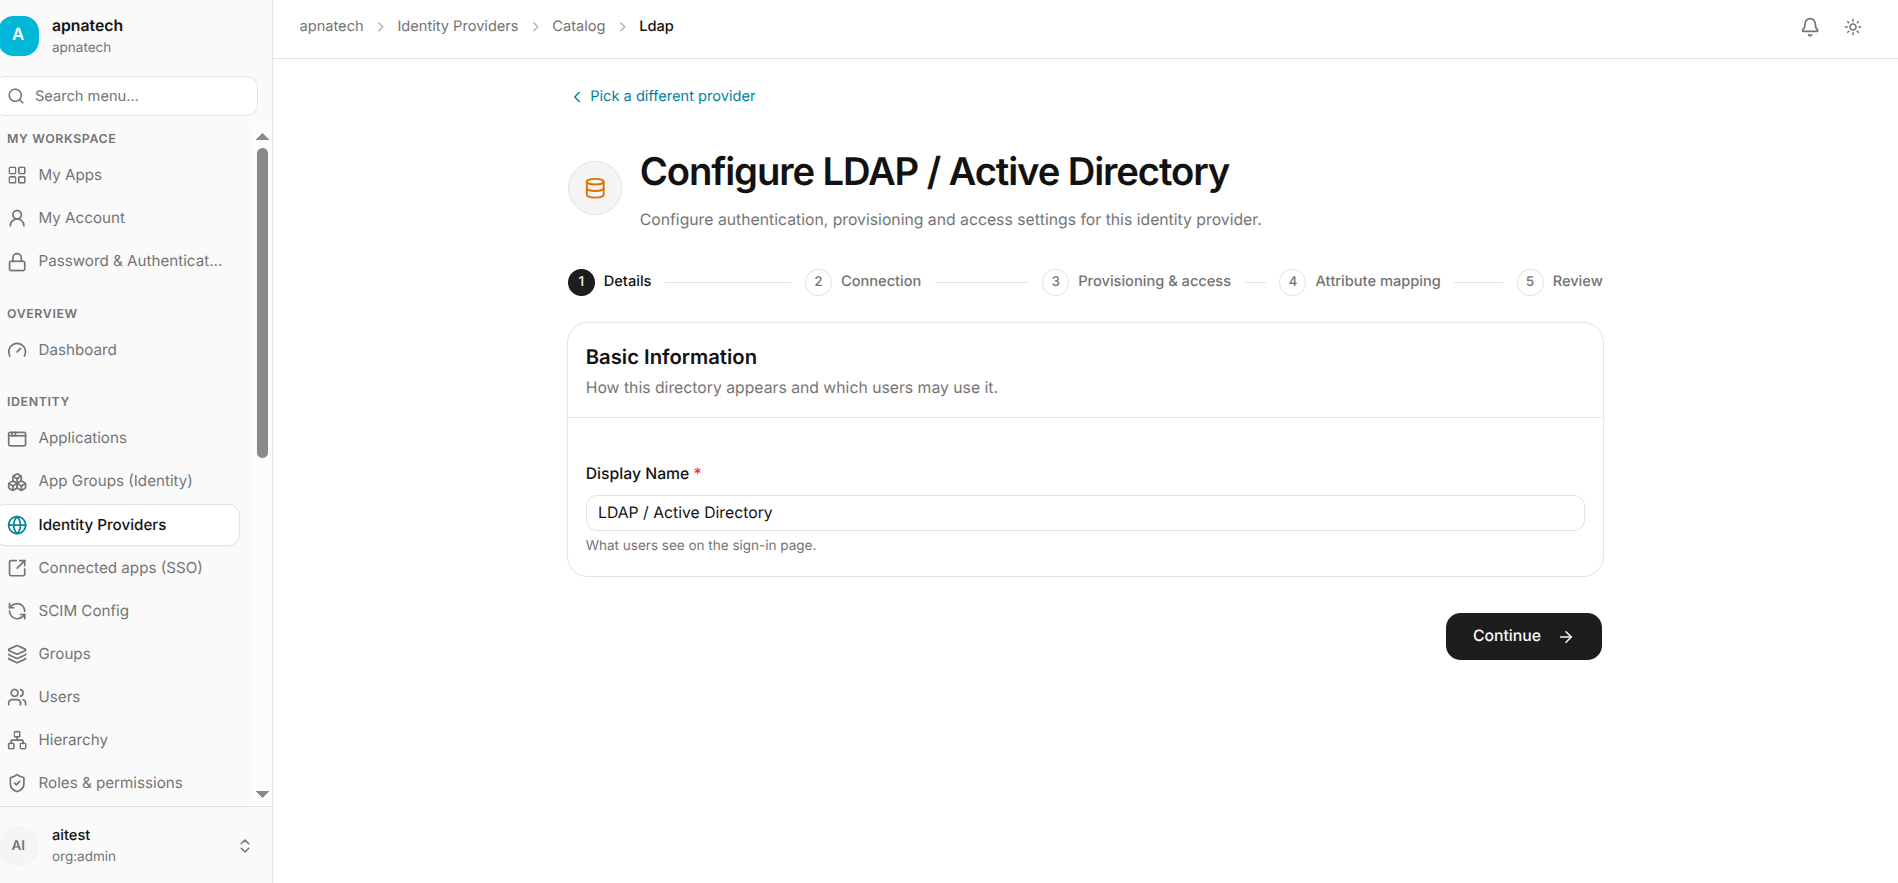
Step 2.1: Details
The Details step contains the basic information about the Identity Provider.
Enter a name that makes the provider easy to identify.
Example:
| Field | Value |
|---|---|
| Name | Corporate LDAP |
| Provider type | LDAP |
| Description | Primary LDAP Directory Service |
If the application provides an Enabled option, enable the provider when you are ready to make it available to users.
Click Continue.
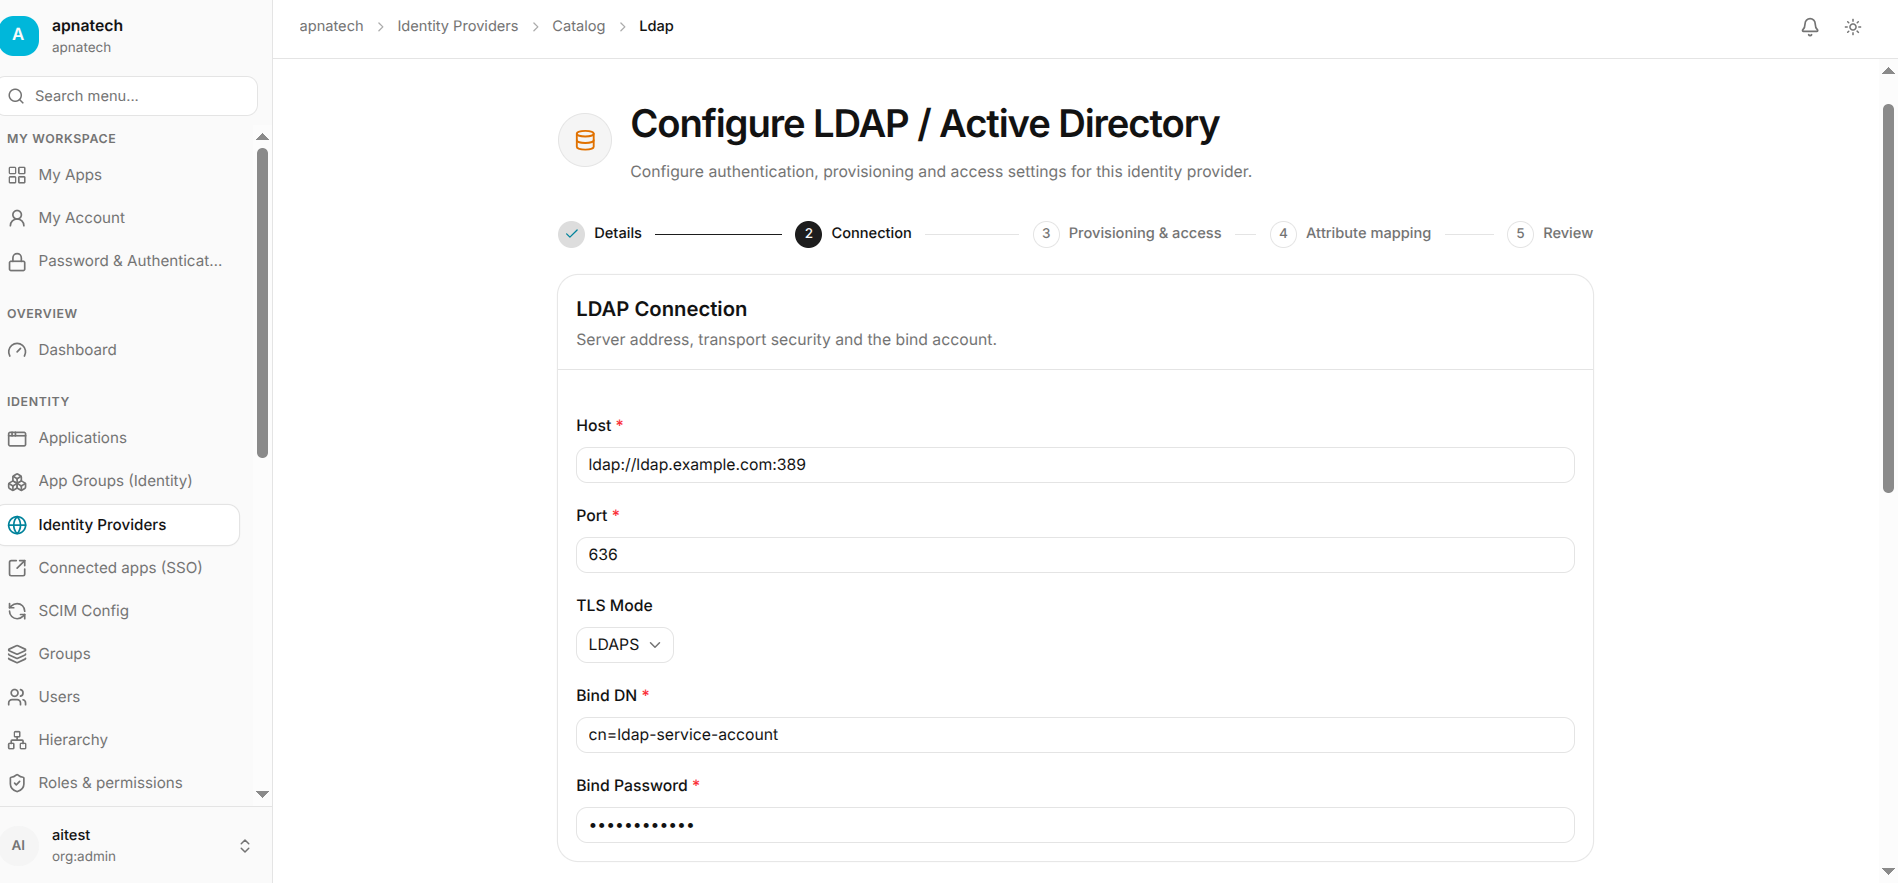
Step 2.2: Connection
The Connection step contains the LDAP connection and bind settings.
Use the following LDAP connection values:
| Application field | Standard LDAP value / Example |
|---|---|
| Server Hostname / URL | ldaps://ldap.example.com or ldap.example.com |
| Port | 636 (for LDAPS) or 389 (for LDAP/StartTLS) |
| Connection Protocol | LDAPS or LDAP with StartTLS |
| Bind DN | cn=ldap-service-account,ou=Services,dc=example,dc=com |
| Bind Password | <service-account-password> |
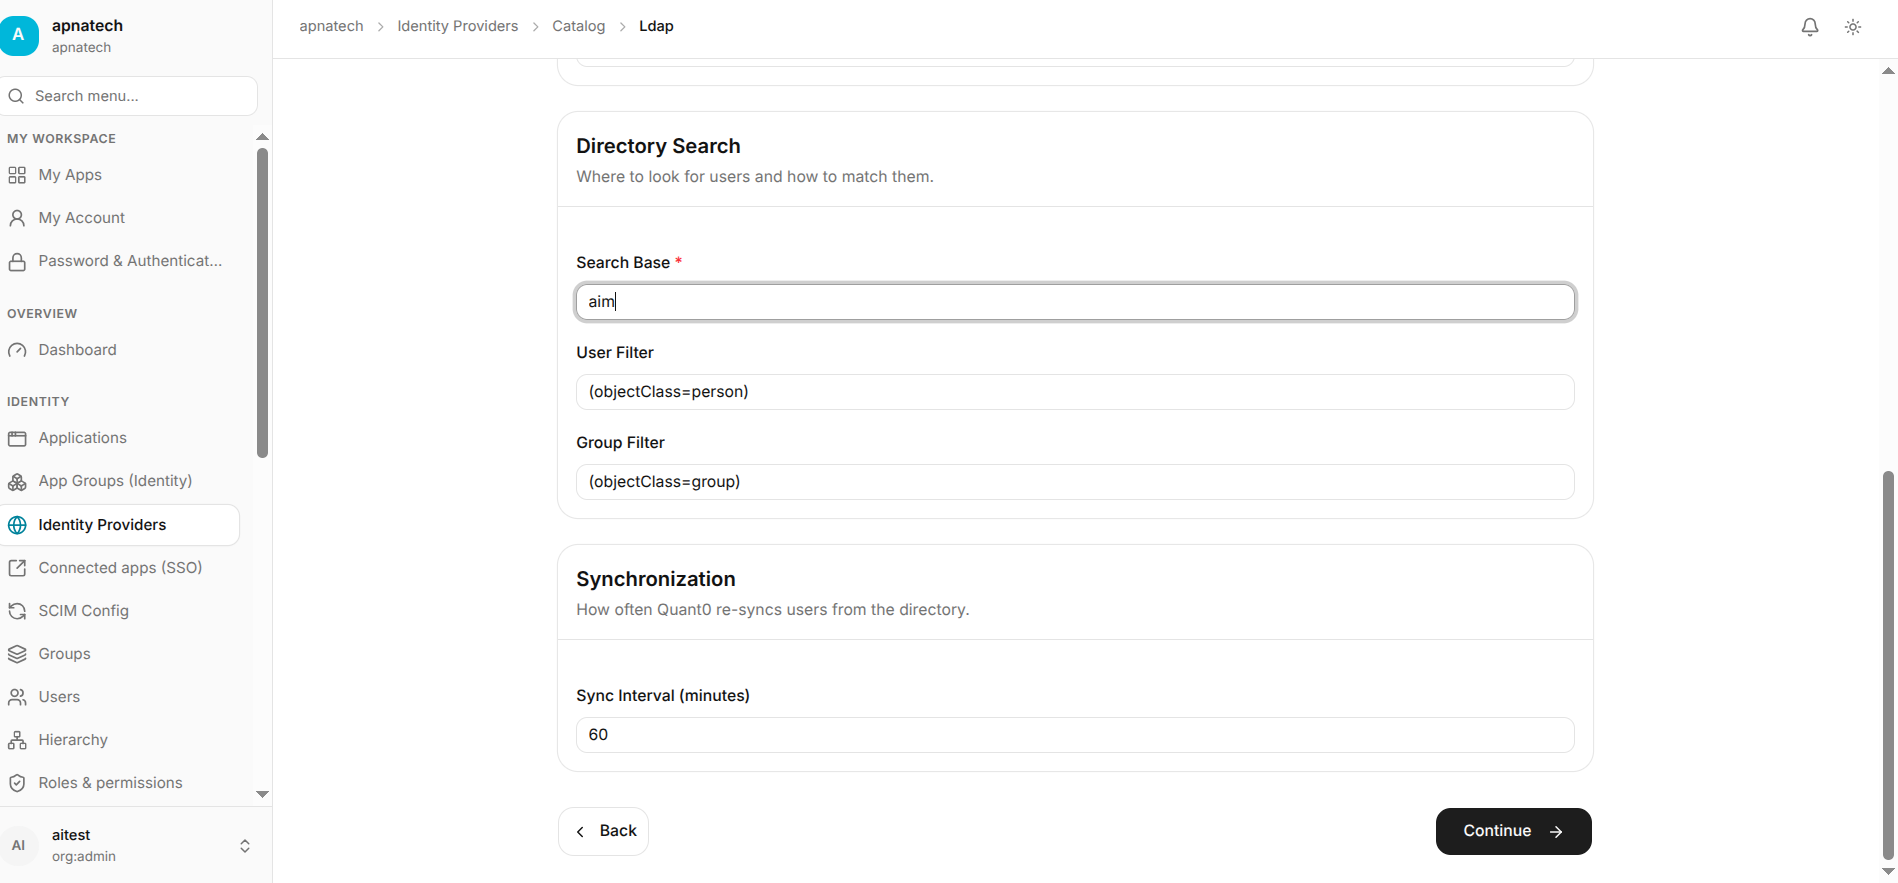
| Base DN | ou=Users,dc=example,dc=com |
| User Search Filter | (&(objectClass=person)(uid={0})) |
| User Object Class | inetOrgPerson / person / user |
Encryption and Security Options
- LDAPS (SSL/TLS): Encrypts all traffic between the application and LDAP server from initial connection.
- StartTLS: Upgrades an unencrypted connection on port 389 to TLS.
- CA Certificate: If using a private or self-signed Certificate Authority, upload your CA certificate (
ca.crt) so the application trusts the LDAP server.
Test Connection
If your application provides a Test Connection or Test Bind button, click it to verify that:
- Network connectivity is established.
- The Bind DN and Password are accepted.
- The Base DN exists and can be searched.
Click Continue.
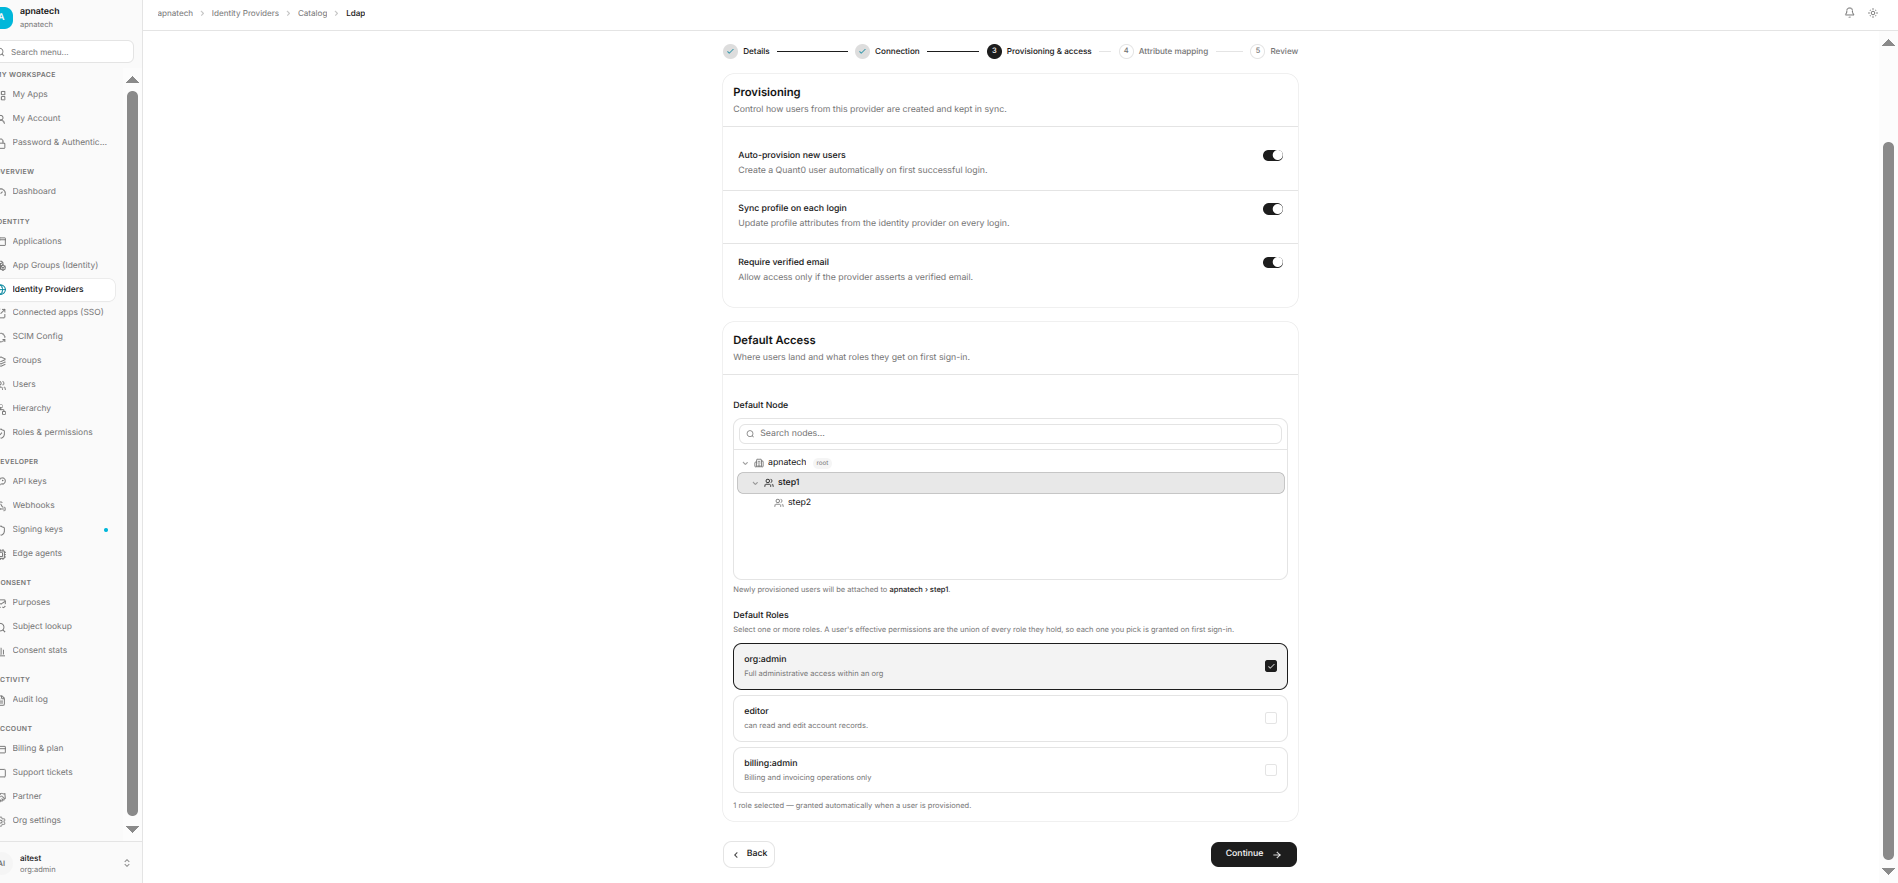
Step 2.3: Provisioning & Access
The Provisioning & access step controls which users can access the application via LDAP and how account lifecycle is managed.
Configure the options according to your application's access model:
| Setting | Recommended configuration |
|---|---|
| Provider status | Enabled |
| User access | Restrict by LDAP Group or Organizational Unit (OU) |
| Account creation | Enable JIT (Just-in-Time) provisioning if supported |
| Existing user matching | Match by mail or LDAP uid / sAMAccountName |
Just-in-time user provisioning
If the application supports Just-in-Time (JIT) provisioning, a user account is automatically created in the application during their first successful LDAP login.
If JIT provisioning is disabled, users must be pre-provisioned or synced via directory sync before they can log in.
The exact provisioning and access fields depend on the application. Use the access policy defined by your organization.
Click Continue.
Step 2.4: Attribute Mapping
The Attribute mapping step maps LDAP attributes returned by your directory server to user attributes in the application.
A typical mapping for standard LDAP (inetOrgPerson) or Active Directory (user):
| Application attribute | Standard LDAP (inetOrgPerson) | Active Directory | Purpose |
|---|---|---|---|
| User ID / Username | uid | sAMAccountName | Unique username identifier |
mail | mail | User email address | |
| First name | givenName | givenName | User first name |
| Last name | sn | sn | User last name |
| Display name | cn or displayName | displayName | User display name |
| Unique Identifier | entryUUID | objectGUID | Stable binary/string identifier |
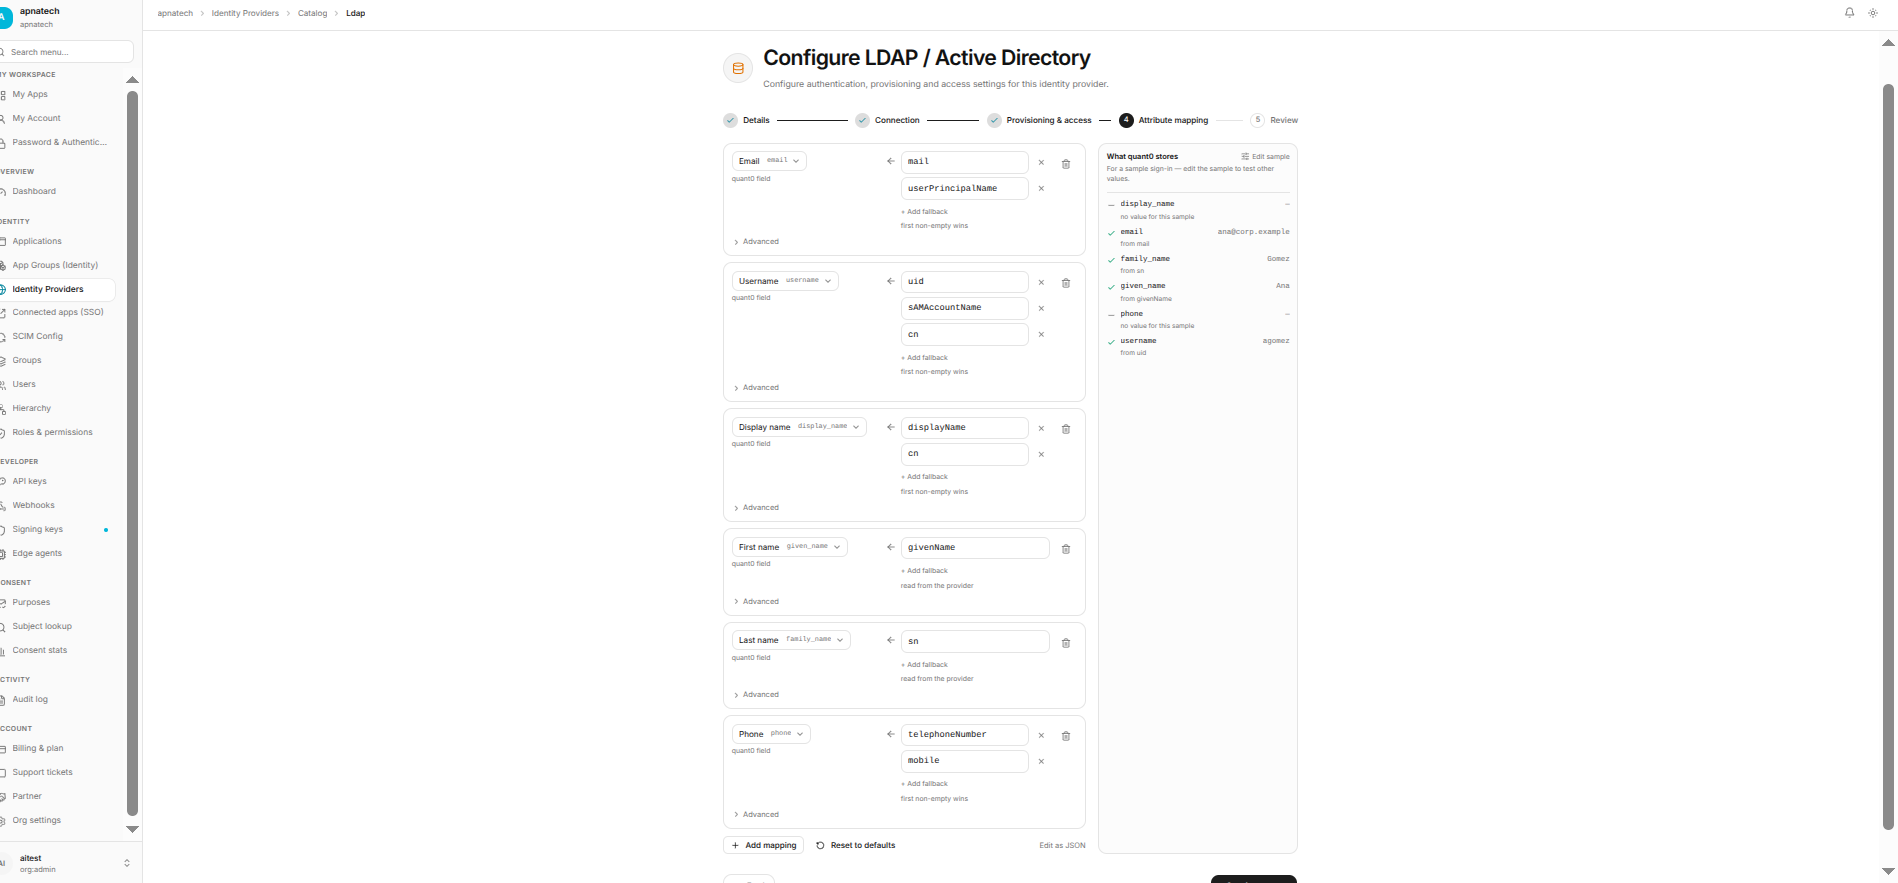
Recommended mapping
uid / sAMAccountName → Username / User ID
mail                 → Email
givenName            → First Name
sn                   → Last Name
displayName          → Display Name
Important: Use a stable unique identifier
While uid or mail are commonly used for sign-in, use entryUUID (OpenLDAP) or objectGUID (Active Directory) if your application supports an immutable external ID mapping, as usernames and emails may change over time.
Click Continue.
Step 2.5: Review
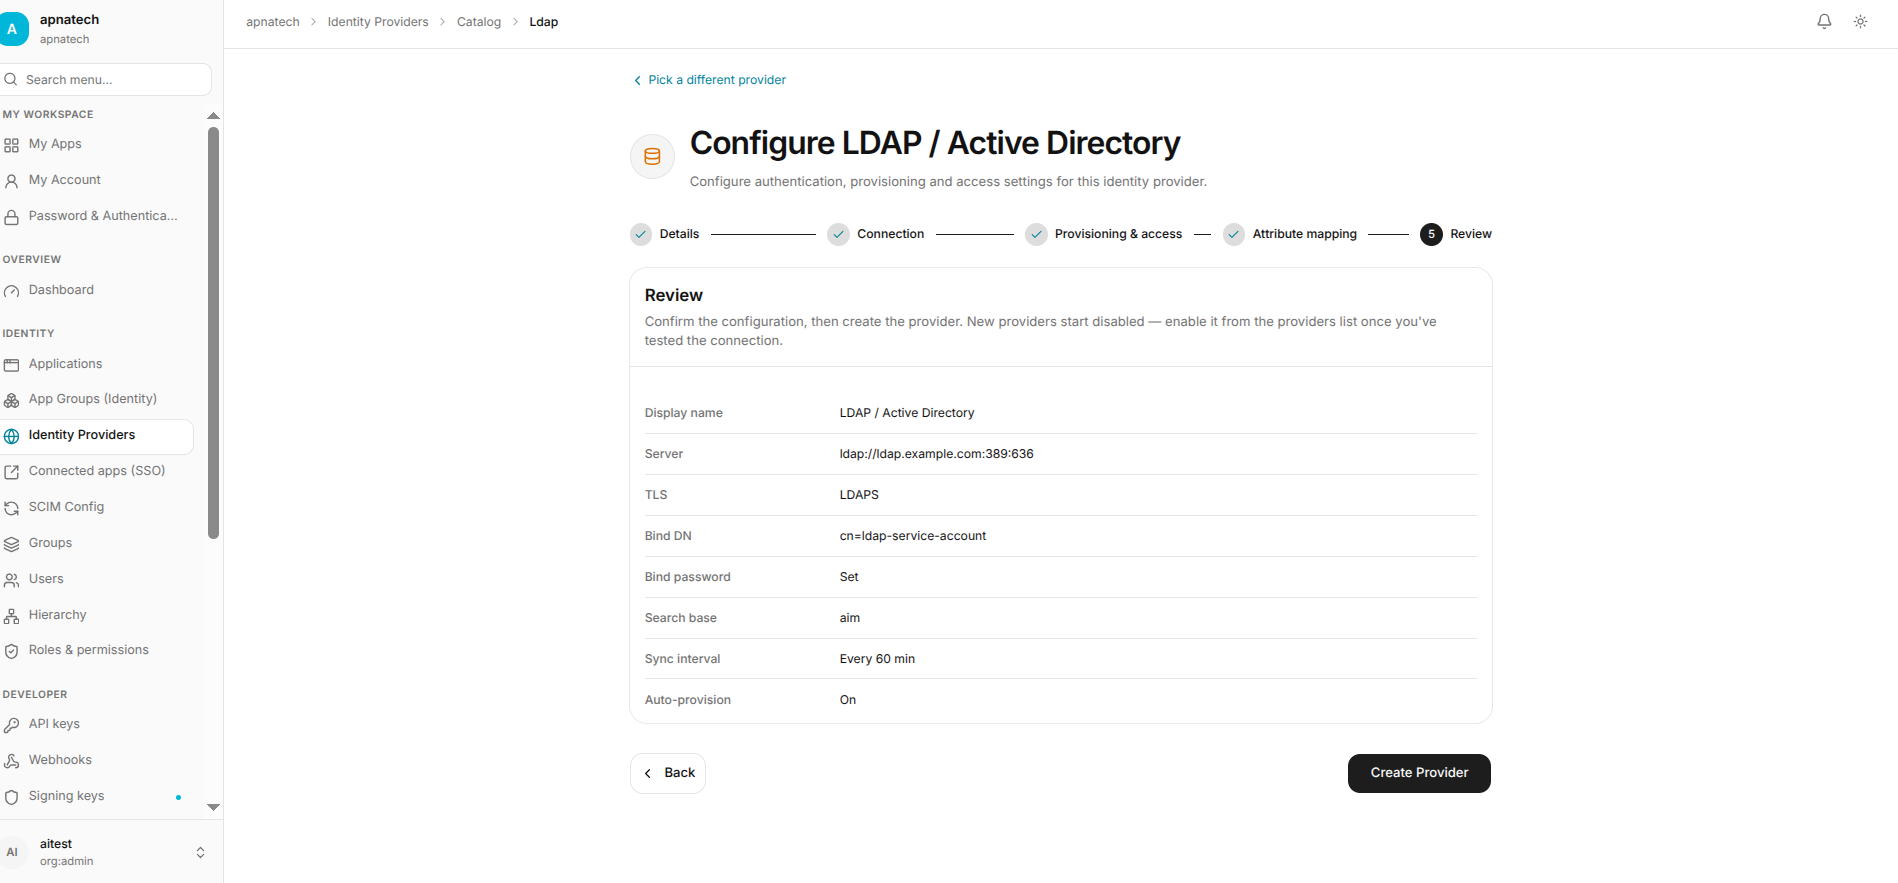
The Review step displays all configuration values before the Identity Provider is saved.
Review the following:
Details
- Provider name is correct.
- Provider type is LDAP.
Connection
- Server Hostname and Port are correct.
- Encryption type (LDAPS / StartTLS) is configured properly.
- Bind DN and Bind Password are verified.
- Base DN and User Search Filters target the correct directory branch.
Provisioning & access
- The provider is enabled.
- Access restrictions (by group or filter) are applied if necessary.
- JIT provisioning is configured according to your organization's requirements.
Attribute mapping
Verify that:
uid / sAMAccountName → Username / User ID
mail                 → Email
givenName            → First Name
sn                   → Last Name
displayName          → Display Name
Click Save, Create, or Finish, depending on the application's UI.
Step 3: Test LDAP Login
After saving the configuration, test the authentication flow.
- Open the application's login page.
- Enter the LDAP user's credentials (e.g.,
uidormailand LDAP password). - The application binds to LDAP using the Bind DN, searches for the user, and attempts a simple bind with the user's Distinguished Name and password.
- Upon successful bind, LDAP retrieves the mapped attributes.
- The application validates the response and creates or signs in the user.
- Verify that the user's attributes were populated correctly.
Expected result
After successful authentication:
- The user is authenticated and granted access.
- The expected email and profile information are populated from LDAP attributes.
- The user receives the access permissions configured in the application.
Troubleshooting
Invalid Credentials / LDAP Error 49
This error indicates authentication failed at the LDAP server during bind.
Check:
- Service account (Bind DN) password accuracy.
- Formatting of the Bind DN string.
- User password accuracy during login test.
User Not Found / Search Failed
Check:
- Base DN: Ensure it encompasses the OU where the user resides.
- Search Filter: Verify the syntax matches your directory schema (e.g.,
uid={0}vssAMAccountName={0}).
Connection Timed Out / Could Not Connect
Check:
- Firewall rules between the application server and LDAP server.
- Hostname resolution (DNS).
- Port configuration (
389vs636).
SSL/TLS Handshake Error
If using LDAPS or StartTLS:
- Ensure the LDAP server's SSL certificate is valid and not expired.
- Upload the LDAP server's root/intermediate CA certificate to the application's truststore if self-signed.
Email or name is missing
Check the Attribute mapping configuration.
Make sure the application maps:
mail        → Email
givenName   → First Name
sn          → Last Name
displayName → Display Name